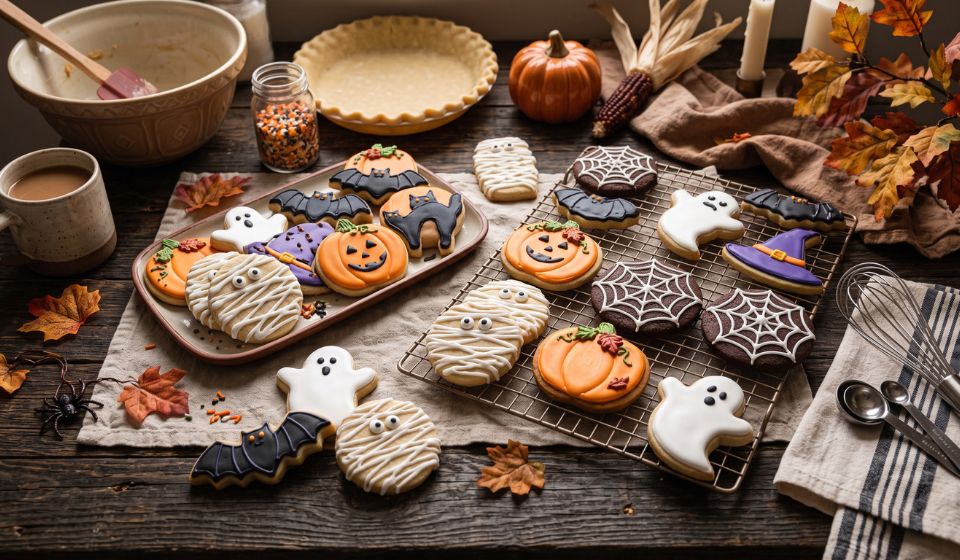
Halloween is the perfect time to bake fun, colorful, and delicious cookies that everyone will love. These classic Halloween sugar cookies are soft in the center, slightly crisp around the edges, and decorated with festive orange, black, purple, and white icing. Whether you’re hosting a Halloween party, preparing treats for kids, or simply enjoying a cozy baking day at home, this easy step-by-step recipe is beginner-friendly and delivers bakery-style results.
This recipe makes about 24 medium cookies and is designed with common U.S. baking ingredients and measurements.
Why You’ll Love These Halloween Cookies
- Soft and buttery texture
- Easy for beginners
- Great for decorating with kids
- Perfect for Halloween parties
- Can be made ahead and frozen
- Uses simple pantry ingredients
Ingredients
For the Cookie Dough
- 2¾ cups all-purpose flour
- 1 teaspoon baking powder
- ½ teaspoon salt
- 1 cup unsalted butter, softened
- 1 cup granulated sugar
- 1 large egg
- 2 teaspoons vanilla extract
- ½ teaspoon almond extract (optional)
- 1 tablespoon milk
For the Royal Icing
- 4 cups powdered sugar
- 3 tablespoons meringue powder
- 5–6 tablespoons warm water
- Food coloring (orange, black, purple, green, and white)
- Halloween sprinkles (optional)
Equipment Needed
- Mixing bowls
- Electric mixer
- Measuring cups and spoons
- Rolling pin
- Halloween cookie cutters (pumpkin, ghost, bat, witch hat, cat, skull)
- Baking sheets
- Parchment paper
- Cooling rack
- Piping bags
Step 1: Prepare the Dry Ingredients
In a medium bowl, whisk together the flour, baking powder, and salt. Mixing these ingredients first helps distribute the baking powder evenly so every cookie bakes consistently. Set the bowl aside.
Step 2: Cream the Butter and Sugar
In a large mixing bowl, beat the softened butter and granulated sugar on medium speed for about 3–4 minutes until the mixture becomes pale, fluffy, and creamy.
This step adds air into the dough, creating soft cookies.
Step 3: Add the Wet Ingredients
Beat in the egg until fully combined.
Mix in:
- Vanilla extract
- Almond extract (optional)
- Milk
Continue mixing until smooth.
Step 4: Combine Everything
Gradually add the flour mixture into the butter mixture.
Mix on low speed until a soft dough forms.
Avoid overmixing because it can make cookies tough instead of tender.
Step 5: Chill the Dough
Divide the dough into two portions.
Flatten each into a disk and wrap tightly in plastic wrap.
Refrigerate for at least 1 hour.
Cold dough is easier to roll and helps cookies keep their Halloween shapes while baking.
Step 6: Roll Out the Dough
Preheat your oven to 350°F (175°C).
Lightly flour your countertop.
Roll the chilled dough to about ¼-inch thickness.
Cut into Halloween shapes using cookie cutters.
Popular designs include:
- Pumpkins
- Ghosts
- Bats
- Black cats
- Witches
- Candy corn
- Haunted houses
- Skeletons
Place cookies about 2 inches apart on a parchment-lined baking sheet.
Step 7: Bake
Bake for 8–10 minutes.
The cookies are done when the edges are just beginning to turn light golden.
Do not overbake.
Soft cookies continue cooking slightly after leaving the oven.
Allow cookies to cool for 5 minutes on the baking sheet before transferring to a cooling rack.
Cool completely before decorating.
Step 8: Make the Royal Icing
In a mixing bowl combine:
- Powdered sugar
- Meringue powder
- Warm water
Beat for about 5 minutes until thick and glossy.
Divide icing into separate bowls.
Color each bowl using Halloween food colors.
Transfer icing into piping bags.
Step 9: Decorate Your Halloween Cookies
Outline each cookie first.
Allow the outline to set for 2–3 minutes.
Flood the center with thinner icing.
Use a toothpick to spread icing evenly.
Decorate with:
- Candy eyes
- Halloween sprinkles
- Colored sugar
- Mini chocolate chips
- Edible glitter
- Orange and black sanding sugar
Create fun designs such as:
- Smiling pumpkins
- Friendly ghosts
- Spider webs
- Witch hats
- Monster faces
- Candy corn stripes
Allow icing to dry completely for 6–8 hours or overnight before stacking.
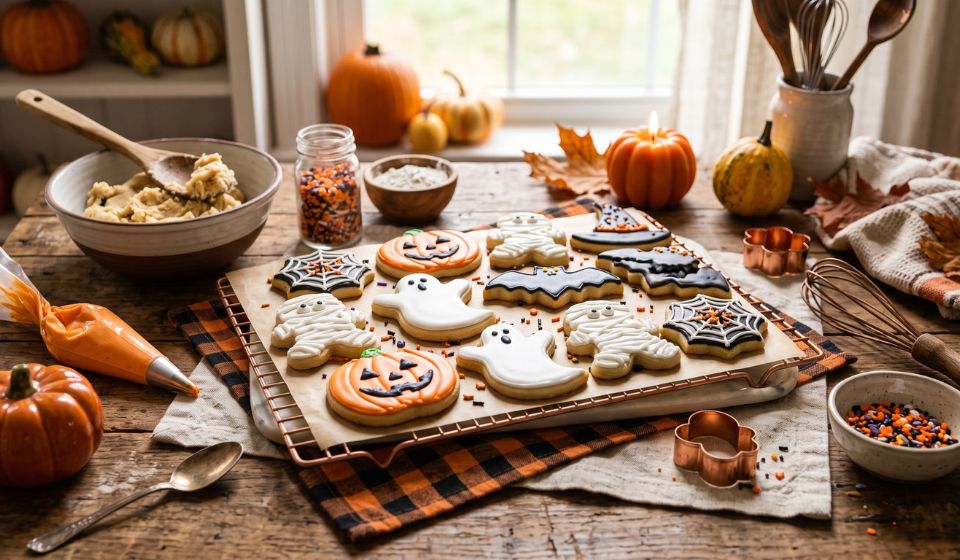
Fun Decoration Ideas
Pumpkin Cookies
Use orange icing with green stems and add a smiling jack-o’-lantern face using black icing.
Ghost Cookies
Cover with white icing and add black eyes and a surprised mouth.
Bat Cookies
Decorate with black icing and tiny candy eyes.
Monster Cookies
Use bright green, purple, or blue icing with goofy eyes and funny smiles.
Spider Web Cookies
Pipe white web patterns over black icing for a spooky effect.
Storage Tips
Store decorated cookies in an airtight container at room temperature for up to one week.
Undecorated cookies can be frozen for up to three months.
Royal icing decorations stay best when cookies are stored in a single layer until fully dry.
Helpful Baking Tips
- Always use room-temperature butter.
- Chill the dough before rolling.
- Avoid adding too much flour while rolling.
- Rotate baking sheets halfway through baking for even results.
- Let cookies cool completely before icing.
- Use gel food coloring for brighter Halloween colors.
- Keep icing covered to prevent it from drying out.
Variations
Chocolate Halloween Cookies
Replace ½ cup flour with unsweetened cocoa powder for chocolate-flavored cookies.
Pumpkin Spice Cookies
Add 1 teaspoon pumpkin pie spice for warm fall flavor.
Cinnamon Sugar Cookies
Skip the icing and coat warm cookies in cinnamon sugar.
Gluten-Free Version
Use a quality 1-to-1 gluten-free baking flour.
Nutrition Information
| Nutrient | Amount (Per Cookie) |
|---|---|
| Calories | 190 |
| Carbohydrates | 28g |
| Protein | 2g |
| Fat | 8g |
| Saturated Fat | 5g |
| Cholesterol | 25mg |
| Sodium | 85mg |
| Sugar | 17g |
| Fiber | 0.5g |
Final Thoughts
These homemade Halloween Cookies are festive, delicious, and simple enough for bakers of all skill levels. With a soft buttery texture, colorful royal icing, and endless decorating possibilities, they’re perfect for Halloween parties, school events, family gatherings, or gifting to friends and neighbors. Prepare the dough in advance, get creative with spooky decorations, and enjoy a fun baking tradition that everyone will remember. Happy Halloween and happy baking!