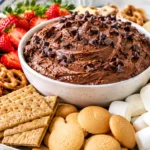
There are desserts that take hours to prepare, and then there are recipes like this one that deliver incredible flavor with very little effort. A No-Bake Oreo Cheesecake in a Jar is one of those desserts that looks impressive but comes together in just a few simple steps. It combines crushed Oreo cookies, a smooth cheesecake filling, and fluffy whipped cream into beautiful individual servings that everyone loves.
Whether you’re preparing desserts for a birthday party, summer picnic, holiday gathering, or simply craving something sweet after dinner, this recipe is an excellent choice. Since it doesn’t require an oven, it’s especially popular during warm weather when you want to avoid heating the kitchen.
The individual jar presentation also makes serving incredibly easy. Every guest gets their own perfectly layered dessert with no slicing, no mess, and no extra work.
Why You’ll Love This Recipe
This Oreo cheesecake in a jar has become a favorite for many reasons.
- No baking required
- Rich and creamy texture
- Ready with simple pantry ingredients
- Perfect make-ahead dessert
- Great for parties and celebrations
- Easy enough for beginners
- Kid-friendly recipe
- Beautiful individual presentation
- Easy to customize with toppings
Ingredients
For the Oreo Crust
- 24 Oreo cookies
- 4 tablespoons melted unsalted butter
For the Cheesecake Filling
- 16 ounces cream cheese, softened
- ¾ cup powdered sugar
- 1 teaspoon vanilla extract
- 1½ cups heavy whipping cream
- 8 crushed Oreo cookies
Optional Toppings
- Mini Oreos
- Chocolate syrup
- Whipped cream
- Chocolate shavings
- Crushed Oreo crumbs
- White chocolate chips
- Fresh strawberries
- Fresh raspberries
Kitchen Equipment
You’ll need:
- Mixing bowls
- Electric hand mixer or stand mixer
- Food processor (or zip-top bag and rolling pin)
- Measuring cups
- Serving jars (8-ounce jars work well)
- Spoon or piping bag
- Rubber spatula
Step 1: Prepare the Oreo Crust
Place the Oreo cookies into a food processor and pulse until fine crumbs form.
If you don’t own a food processor, place the cookies inside a sealed plastic bag and crush them using a rolling pin.
Mix the crumbs with melted butter until every crumb is evenly coated.
The mixture should resemble wet sand.
Step 2: Make the Cheesecake Filling
In a large mixing bowl, beat softened cream cheese until completely smooth.
Add powdered sugar and vanilla extract.
Continue mixing until creamy.
In another bowl, whip the heavy cream until stiff peaks form.
Carefully fold the whipped cream into the cream cheese mixture.
Avoid overmixing because you want the filling to remain light and airy.
Finally, gently fold in the crushed Oreo cookies.
Step 3: Assemble the Dessert
Add a layer of Oreo crust into each jar.
Press gently using the back of a spoon.
Next, add a generous layer of cheesecake filling.
Repeat the layers.
Finish with whipped cream on top.
Decorate with crushed Oreos, mini cookies, chocolate syrup, or chocolate curls.
Step 4: Chill
Cover each jar.
Refrigerate for at least 3–4 hours.
For the best flavor and texture, chill overnight.
The cheesecake filling becomes firmer while the Oreo layers soften slightly, creating the perfect bite.
Tips for the Best Oreo Cheesecake
Use Room Temperature Cream Cheese
Cold cream cheese creates lumps.
Allow it to sit at room temperature for about 30 minutes before mixing.
Don’t Overwhip
Mix only until ingredients are combined.
Too much mixing can make the filling lose its fluffy texture.
Chill Long Enough
Patience pays off.
Longer chilling produces a firmer cheesecake.
Pipe the Filling
Using a piping bag creates cleaner, more attractive layers.
Keep Everything Cold
Heavy cream whips best when chilled.
Cold ingredients also help maintain structure.
Delicious Flavor Variations
Peanut Butter Oreo Cheesecake
Add ½ cup creamy peanut butter to the filling.
Top with chopped peanut butter cups.
Mint Oreo Cheesecake
Use Mint Oreos.
Add a few drops of peppermint extract.
Top with chocolate curls.
Strawberry Oreo Cheesecake
Add chopped strawberries between layers.
Finish with fresh berries.
Cookies and Cream Explosion
Mix extra Oreo chunks into the filling.
Top with mini Oreos and cookie crumbs.
Chocolate Lovers Version
Add cocoa powder to the cheesecake filling.
Finish with chocolate ganache.
Make-Ahead Instructions
This dessert is perfect for preparing in advance.
Store assembled jars in the refrigerator for up to 3 days.
Add whipped cream shortly before serving for the freshest appearance.
Storage Tips
Keep jars tightly covered.
Store in the refrigerator.
Do not leave at room temperature for more than 2 hours.
Freezing is possible, although the texture becomes more like frozen cheesecake.
Freeze for up to one month.
Thaw overnight inside the refrigerator.
Perfect Occasions
This dessert works wonderfully for:
- Birthday parties
- Baby showers
- Graduation celebrations
- Holiday dinners
- Valentine’s Day
- Mother’s Day
- Father’s Day
- Summer BBQs
- Family movie nights
- Potluck gatherings
- Bridal showers
- Christmas dessert tables
Best Toppings
Try mixing different toppings for variety.
Popular options include:
- Oreo crumbs
- Chocolate sauce
- Caramel drizzle
- Fresh berries
- Whipped cream
- Chocolate curls
- Mini chocolate chips
- White chocolate drizzle
- Peanut butter drizzle
- Crushed candy bars
Common Mistakes to Avoid
Using Cold Cream Cheese
This leaves lumps in the filling.
Skipping Chill Time
The dessert won’t set properly.
Adding Too Much Butter
The crust becomes greasy.
Overmixing the Filling
This can reduce the light, fluffy texture.
Filling the Jars Too Full
Leave enough space for decorative toppings.
Serving Ideas
Serve the cheesecake jars straight from the refrigerator.
Pair them with:
- Fresh coffee
- Cold milk
- Hot chocolate
- Iced mocha
- Vanilla latte
- Fresh strawberries
- Chocolate-covered berries
These pairings make the dessert feel even more special.
Nutrition (Approximate Per Serving)
- Calories: 470
- Carbohydrates: 39g
- Protein: 6g
- Fat: 33g
- Saturated Fat: 19g
- Sugar: 28g
- Sodium: 320mg
Values may vary depending on ingredient brands.
Why Everyone Loves Oreo Cheesecake in a Jar
Few desserts are as universally loved as Oreo cheesecake. The combination of crunchy chocolate cookies, creamy cheesecake filling, and fluffy whipped cream creates a perfect balance of textures and flavors. Serving it in jars makes the dessert even more appealing, giving each portion a polished, café-style presentation while making cleanup and transportation simple.
Because this recipe is completely no-bake, it’s ideal for busy weekdays, last-minute gatherings, or anyone who wants an impressive dessert without spending hours in the kitchen. You can customize each jar with different toppings, making it easy to satisfy a variety of tastes at the same event.
Whether you’re preparing dessert for family, friends, or guests, this recipe consistently delivers rich flavor, beautiful presentation, and effortless preparation. Once you make these creamy Oreo cheesecake jars, they’re likely to become one of your go-to desserts for every season.