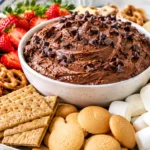
There’s something comforting about a bowl of homemade chocolate pudding. It’s silky, creamy, deeply chocolatey, and made with pantry staples that most people already have in their kitchen. Unlike many store-bought pudding cups, this homemade version contains fresh ingredients and delivers a richer flavor with a perfectly smooth texture.
Whether you’re preparing a simple family dessert, looking for an easy weekend treat, or planning a make-ahead dessert for guests, chocolate pudding is always a winning choice. The recipe is beginner-friendly, requires no fancy equipment, and can be customized with your favorite toppings.
This guide explains every step in detail, along with expert tips to help you create restaurant-quality chocolate pudding right in your own kitchen.
Why Homemade Chocolate Pudding Is Better
Making chocolate pudding from scratch gives you complete control over the ingredients and flavor. Fresh milk, real cocoa powder, quality chocolate, and just the right amount of sweetness combine to create a dessert that tastes far superior to packaged mixes.
Benefits include:
- Rich chocolate flavor
- Smooth and creamy consistency
- No artificial preservatives
- Easy to customize
- Budget-friendly
- Perfect for all ages
Once you try homemade pudding, it’s hard to go back to instant versions.
Ingredients
Main Ingredients
- 2 cups whole milk
- ½ cup heavy cream
- ½ cup granulated sugar
- ¼ cup unsweetened cocoa powder
- 3 tablespoons cornstarch
- ¼ teaspoon salt
- 2 egg yolks
- 4 ounces dark chocolate, finely chopped
- 1 teaspoon vanilla extract
- 1 tablespoon butter
Optional Toppings
- Whipped cream
- Chocolate curls
- Fresh strawberries
- Raspberries
- Chopped almonds
- Toasted hazelnuts
- Mini chocolate chips
- Cocoa powder
- Caramel drizzle
- Crushed cookies
Kitchen Equipment
- Medium saucepan
- Mixing bowl
- Whisk
- Rubber spatula
- Measuring cups
- Fine mesh strainer
- Serving bowls or glasses
Step 1: Mix the Dry Ingredients
In a medium saucepan, combine:
- Sugar
- Cocoa powder
- Cornstarch
- Salt
Whisk thoroughly until everything is evenly mixed. This helps prevent lumps later.
Step 2: Add Milk Slowly
Pour the milk into the saucepan gradually while whisking continuously.
Adding the milk slowly helps create a perfectly smooth mixture before heating.
Step 3: Heat the Mixture
Place the saucepan over medium heat.
Keep whisking continuously.
After several minutes, the mixture will begin to warm and slowly thicken.
Do not allow it to boil aggressively.
Step 4: Temper the Egg Yolks
Beat the egg yolks in a separate bowl.
Slowly pour a few tablespoons of the hot chocolate mixture into the eggs while whisking constantly.
Repeat this several times.
This process warms the eggs gently without scrambling them.
Step 5: Combine Everything
Pour the tempered egg mixture back into the saucepan.
Continue cooking over medium-low heat.
Whisk constantly for about 2–3 minutes until the pudding becomes thick and glossy.
Step 6: Add Chocolate
Remove the pan from heat.
Add:
- Chopped dark chocolate
- Butter
- Vanilla extract
Whisk until everything melts into a silky smooth pudding.
The chocolate adds extra richness while the butter creates a luxurious finish.
Step 7: Strain for Extra Smoothness
Pour the pudding through a fine mesh strainer.
Although optional, this step removes any tiny lumps and creates an exceptionally smooth texture.
Step 8: Chill
Divide the pudding into serving dishes.
Cover each bowl with plastic wrap touching the surface.
This prevents a skin from forming.
Refrigerate for at least 3 hours.
For the best flavor, chill overnight.
The Secret to Perfect Chocolate Pudding
Great pudding depends on patience.
Keep stirring while cooking to prevent scorching.
Use good-quality chocolate instead of chocolate chips whenever possible.
Whole milk and heavy cream create the richest texture.
Avoid overheating once the pudding has thickened.
Choosing the Best Chocolate
The chocolate you choose greatly affects the final flavor.
Dark chocolate creates an intense, sophisticated taste.
Semi-sweet chocolate provides balanced sweetness.
Milk chocolate creates a lighter dessert that children often enjoy.
High-quality baking chocolate melts more smoothly than many candy bars.
Texture Tips
For extra creamy pudding:
- Use whole milk.
- Add heavy cream.
- Whisk continuously.
- Strain before chilling.
- Chill completely before serving.
These small steps make a noticeable difference.
Flavor Variations
Chocolate pudding can easily be customized.
Mocha Chocolate Pudding
Add one teaspoon of instant espresso powder.
Coffee enhances the chocolate flavor without making the dessert taste like coffee.
Orange Chocolate Pudding
Mix in one teaspoon of fresh orange zest.
The citrus adds brightness and elegance.
Mint Chocolate
Add a few drops of peppermint extract.
Perfect during the holiday season.
Mexican Chocolate
Add cinnamon and a tiny pinch of cayenne pepper.
The warm spices complement the chocolate beautifully.
Salted Chocolate
Sprinkle flaky sea salt over the finished pudding.
The contrast enhances the sweetness.
Serving Ideas
Chocolate pudding is delicious on its own but becomes even more impressive with creative toppings.
Popular serving combinations include:
- Whipped cream and chocolate curls
- Strawberries with shaved chocolate
- Toasted almonds and caramel
- Crushed Oreo cookies
- Fresh raspberries
- Chocolate cookie crumbs
- Banana slices
- Toasted coconut flakes
Layer pudding inside clear dessert glasses for an elegant presentation.
Make-Ahead Dessert
Chocolate pudding is ideal for preparing in advance.
It actually tastes even better after chilling overnight because the flavors continue to develop.
Store individual servings in airtight containers until ready to serve.
Storage Tips
Refrigerator:
Store for up to four days.
Always cover the surface to prevent drying.
Freezer:
Freezing is not recommended because the texture may become grainy after thawing.
Common Mistakes to Avoid
Cooking Over High Heat
High temperatures can scorch the milk and create lumps.
Always cook over medium or medium-low heat.
Not Stirring Enough
Continuous whisking keeps the pudding smooth.
Skipping the Strainer
Even experienced cooks occasionally produce tiny lumps.
Straining creates a silky finish.
Using Low-Quality Chocolate
Better chocolate always produces better pudding.
Nutritional Benefits
While chocolate pudding is a dessert, homemade versions allow better ingredient choices.
Milk provides:
- Calcium
- Protein
- Vitamin D
Dark chocolate contains natural antioxidants that contribute to its rich flavor profile.
Using homemade ingredients also reduces unnecessary preservatives found in many packaged desserts.
Perfect Occasions
This dessert fits nearly every celebration.
Serve it during:
- Family dinners
- Birthday parties
- Holiday meals
- Valentine’s Day
- Summer gatherings
- Potluck dinners
- Children’s celebrations
- Weekend desserts
Its universal appeal makes it one of the easiest desserts to serve to guests.
Expert Tips for Bakery-Style Results
Professional pastry chefs often follow these techniques:
- Sift cocoa powder before mixing.
- Use room-temperature egg yolks.
- Stir with a whisk instead of a spoon.
- Finish with real vanilla extract.
- Chill overnight.
- Garnish immediately before serving.
- Use glass dessert cups for presentation.
These simple habits elevate homemade pudding into a restaurant-quality dessert.
Final Thoughts
Homemade chocolate pudding is one of the easiest desserts to master, yet it delivers impressive results every time. With its velvety texture, rich cocoa flavor, and simple ingredients, this recipe proves that classic desserts never go out of style.
Whether you enjoy it plain, topped with whipped cream, layered with fresh berries, or finished with chocolate shavings, every spoonful offers pure comfort. Once you’ve made this creamy chocolate pudding from scratch, it may become your go-to dessert for family dinners, celebrations, and everyday sweet cravings.